
There are several things to consider while building an OTA solution for your product. We will look at implementing two broad strategies, with the aim of vertical integration of device, apps and the cloud parts. This vertical integration will lead to highly optimized code on the device, re-usable smart phone app components and complete control over the cloud part.
Cloud initiated by IoT Manager/Admin
This strategy is useful in industrial contexts where the environment is known and the devices need to be updated centrally. The package can perform batch or scheduled updates.
This workflow is achieved with the following implementation. The admin console connection to the cloud is authenticated with login.
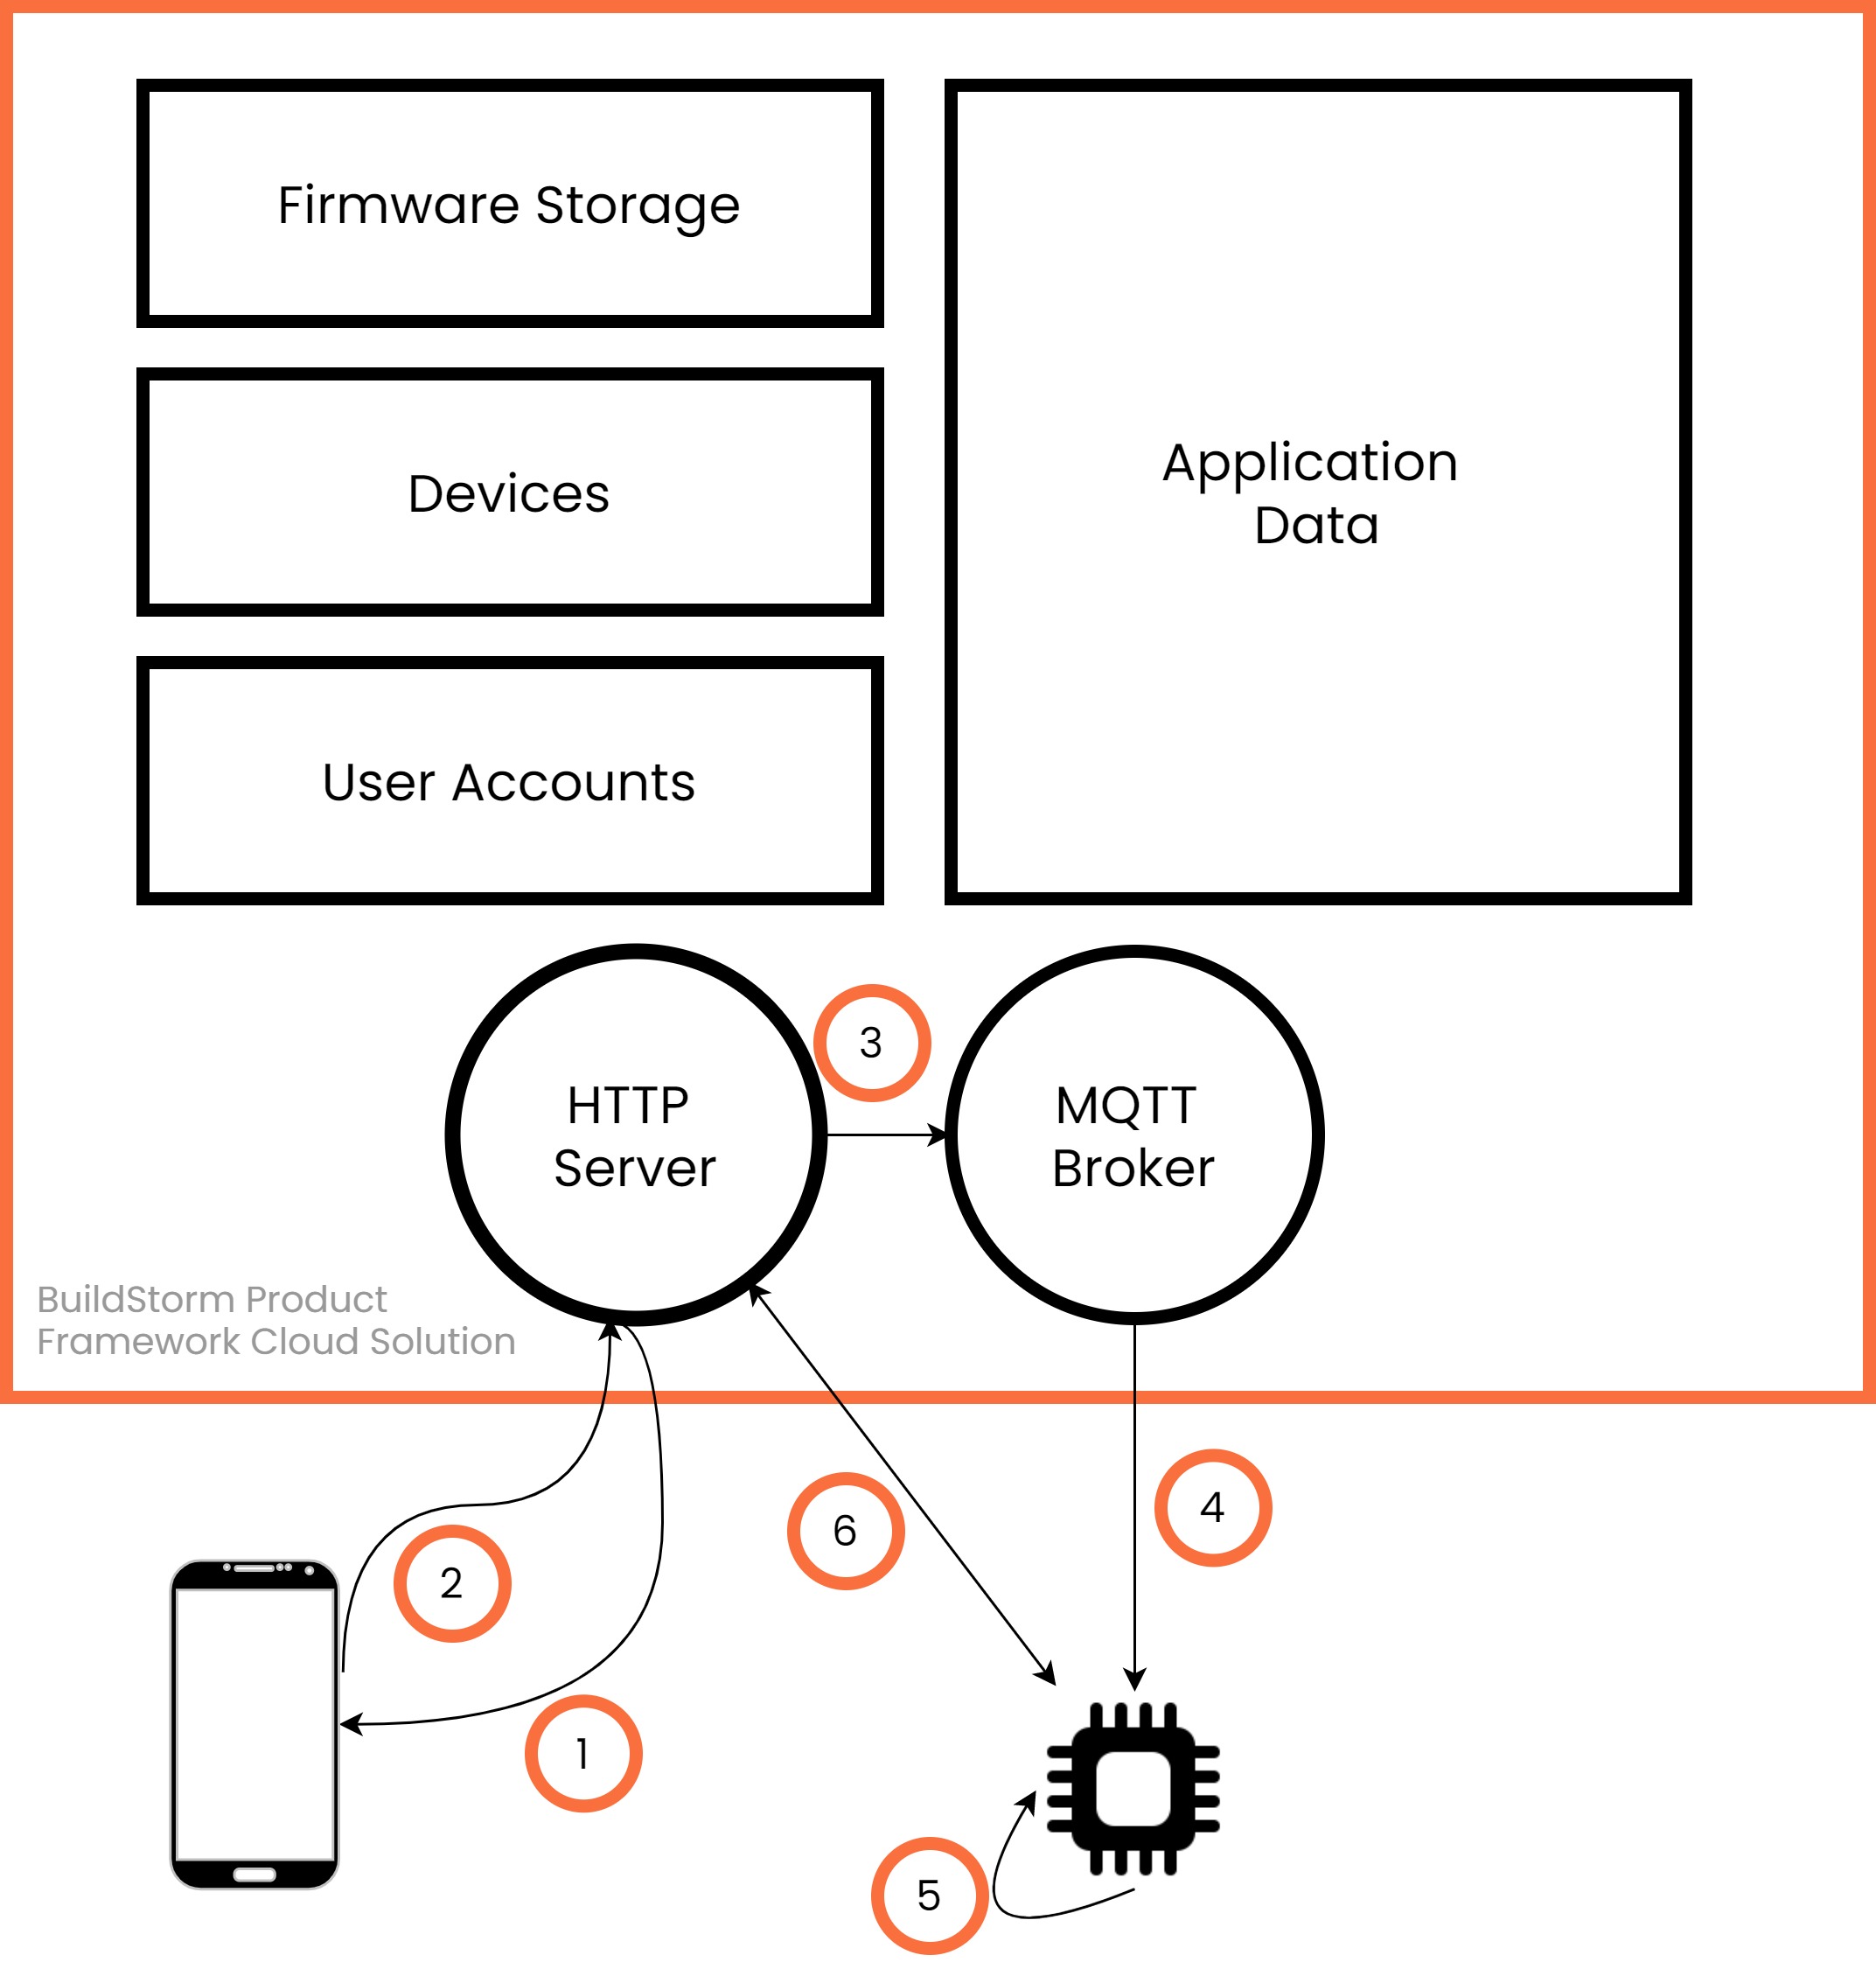
- The admin console/UI sends an OTA Start request to the cloud
- The OTA manager on HTTP server receives the requests and forwards it to the MQTT broker
- The MQTT broker publishes the OTA update command to the device
- The device requests the binary files from the cloud and downloads them
- The device runs the firmware updates and reboots.
Additionally the device sends the firmware update status back to the cloud and it is reflected on the device status.
End User or Field Engineer Controlled
This strategy is used when user or person in field has control over running updates. This is useful in environments where the end device may have other dependencies before updating itself. It is also useful in cases where you want the end user to have more control over the update process.
- The app requests for all the available firmware versions on the cloud
- End user or field engineer selects the firmware version. The app sends the request to the HTTP server.
- The OTA manager on HTTP server receives the requests and forwards it to the MQTT broker
- The MQTT broker publishes the OTA update command to the device
- The device requests the binary files from the cloud and downloads them
- The device runs the firmware updates and reboots.
Additionally the device sends the firmware update status back to the cloud and it is reflected on the device status.
Using the Command Line Interface(CLI) Utility
We have built a CLI utility to test out the solution. The commands/APIs can be embedded in your apps to achieve the desired OTA strategy for ESP32.
Install
The Command Line Utility for the OTA Package makes is easy to test the OTA solution. Start by installing the latest node package and the the NPM.
Make sure you’ve node v14.16.0 and NPM 6.14.11 or above
# verify node and npm versions
$ node -v
v14.16.0
$ npm -v
6.14.11
Now install the demo OTA utility
# install the OTA utlity
npm install -g ota-esp32-demo
+ ota-esp32-demo@1.0.5
installed 1 package in 3.036s
Setup the Device
- Power up the device and flash the test binaries.
- Create a Wi-Fi hotspot for the device to connect.
- SSID — ESP_OTA_DEMO
Password — 12345678 We will soon add support to flash custom firmware.
Create an Account
This command creates an account on the BuildStorm cloud where the solution is hosted. This will be used to add devices, firmware versions and link them to your account
# create an account
# signup email password
$ ota-esp32-demo
:> signup email@company.com ********
# now login to the account
:> login email@company.com ********
:> login success!
Add Device
To add a device, we need the unique device ID. Flash the test firmware locally and the device will output it on the serial terminal.
- Baud: 115200 bps
- Format: 8N1
# get device ID from the serial terminal
device_id:3C71BF4D984C Frimware_version:1.0.0 counter:90
# add the device
$ device add 3C71BF4D984C
$ The device has been mapped to the account.gin success!
# view the device info
$ device info
$
{
_id: ‘601f8a981ffb95ff10800ba3’,
deviceFId: ‘3C71BF4D984C’,
__v: 0,
createdAt: ‘2021-02-07T06:37:12.434Z’,
updatedAt: ‘2021-03-01T05:30:11.630Z’
}
Flash the device Over The Air
The utility allows updating one or more devices at a time. Let’s start with updating a single device.
# Upload and save the firmware binary file to the cloud
# The product name and version can be used to run the firmware update later:> firmware-add myproduct 101 F:/workspace/BSPF/ota/otaTestBinaries-main/esp32_platform_v101.bin
Valid Path
Firmware Uploaded# Now run the command to start the upload process
:> ota-start 3C71BF4D984C myproduct 101
--- Message --- deviceId
--- OTA command issued --- 3C71BF4D984C
Verifying the version
# On the device terminal
device_id:3C71BF4D984C Frimware_version:1.0.1 counter:75
device_id:3C71BF4D984C Frimware_version:1.0.1 counter:76
Customize this solution for your product
The full solution is available as a perpetual license at one time cost. We provide full source code for all the components. This allows you to use it on any number of products that you build and ship. We also help you deploy and customize the OTA implementation as per your product needs. Get in touch at hello@buildstorm.com for more. You may also set up a free consultation call below.