We have written a library around Amazon FreeRTOS that helps you focus on developing applications quickly. The library provides API which is simpler to use, you can write applications without digging into protocol level details. We have included some of the key requirements that are needed to go from prototype to production stage. Like device provisioning, every device that speaks to AWS IoT requires a unique device certificate to authenticate and connect itself. The current version of the library includes device provisioning by claim method, the device would acquire its certificate when it connects the AWS IoT for the first time.
Getting started with the library
- Download and install the ESP-IDF tools installer.
- Setup your AWS account permissions for AWS IoT and FreeRTOS.
- Clone the repository.
git clone https://gitlab.com/SaheblalBagwan/esp32_aws_freertos_demos --branch development --recursive - Change the working directory to the cloned repository.
cd esp32_aws_freertos_demos
Devices that connect to AWS IoT require X.509 certificate for authentication. Once the device is connected it could use MQTT messaging protocol to communicate with AWS IoT and other devices. Therefore we should first start with the provision by claim example and then try out simple publish and subscribe example.
Provision by claim
1. Configure WiFi credentials & AWS IoT endpoint
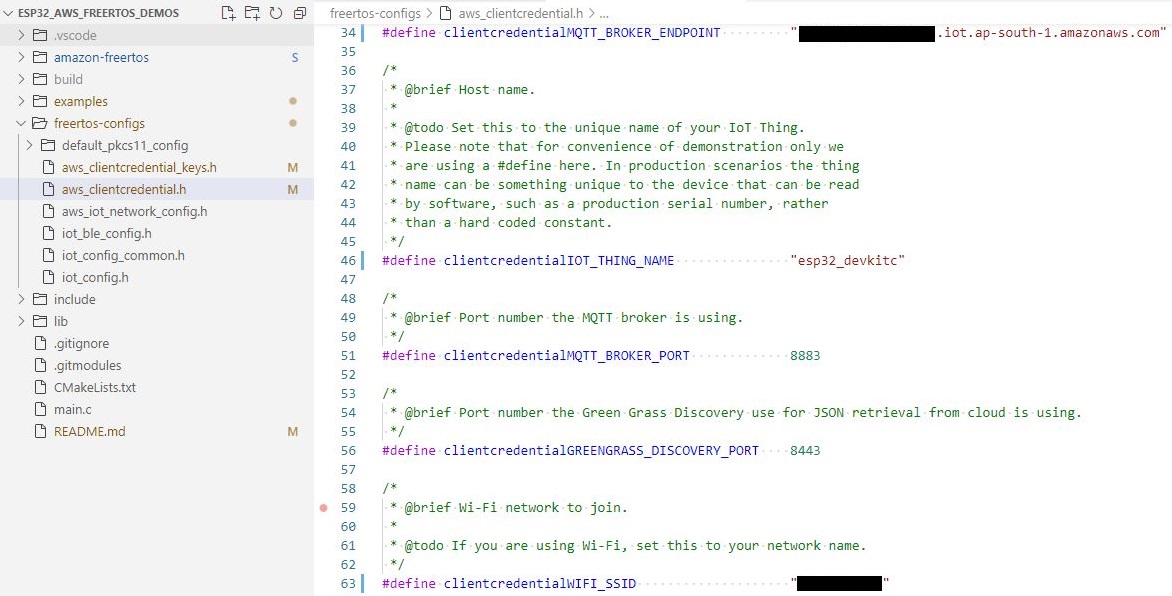
Open and edit ./freertos-configs/aws_clientcredential.h file to define your configuration.
#define clientcredentialMQTT_BROKER_ENDPOINT <AWS_MQTT_BROKER_ENDPOINT>

#define clientcredentialWIFI_SSID <YOUR_WIFI_SSID>

#define clientcredentialWIFI_PASSWORD <YOUR_WIFI_PASSWORD>

#define clientcredentialWIFI_SECURITY <YOUR_WIFI_SECURITY_TYPE>
Example:
2. Configure claim certificate
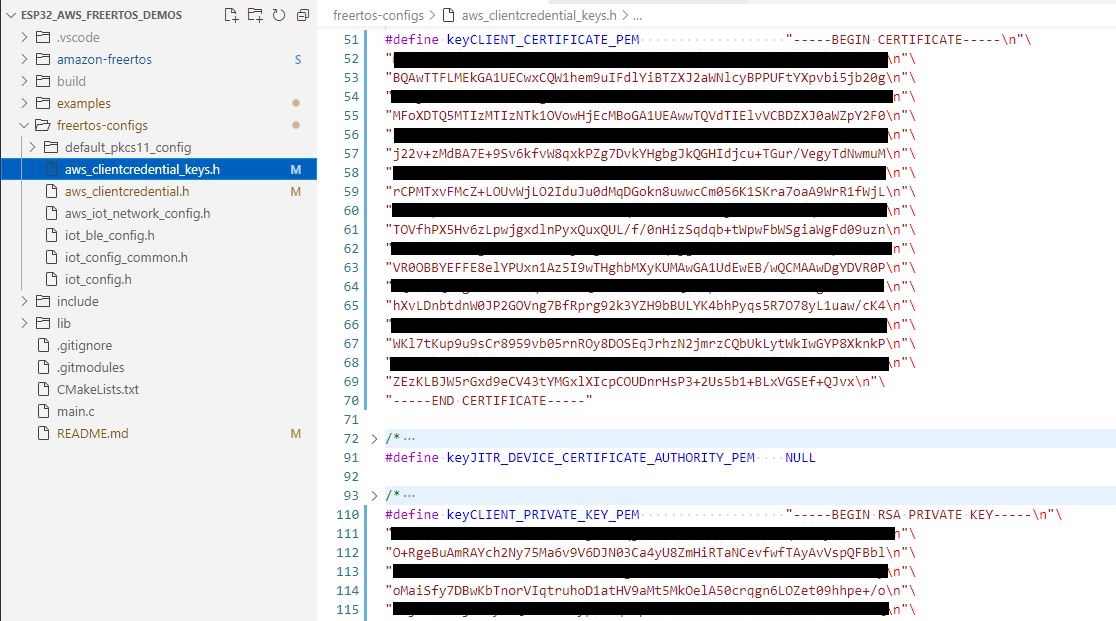
Open and edit ./freertos-configs/aws_clientcredential_keys.h file to define your claim certificate configuration. If you don’t have a claim certificate then you can generate one by following the AWS Side setup instructions for the previous blog post. You will need to download the device certificate and private key files.
Use the PEM to C String conversion tool (./amazon-freertos/tools/certificate_configuration/PEMfileToCString.html ) to generate a C string from the certificate and private key file. Then copy-paste it to the header file.
#define keyCLIENT_CERTIFICATE_PEM <YOUR_CLAIM_CERT>

#define keyCLIENT_PRIVATE_KEY_PEM <YOUR_CLAIM_CERT_PVT_KEY>
Example:
3. Build
A CMakeLists.txt file exists in the root directory that is used for building the project. Copy the main file (.\examples\01_provision_by_claim\main.c) from the example directory to the root directory then build using CMake.
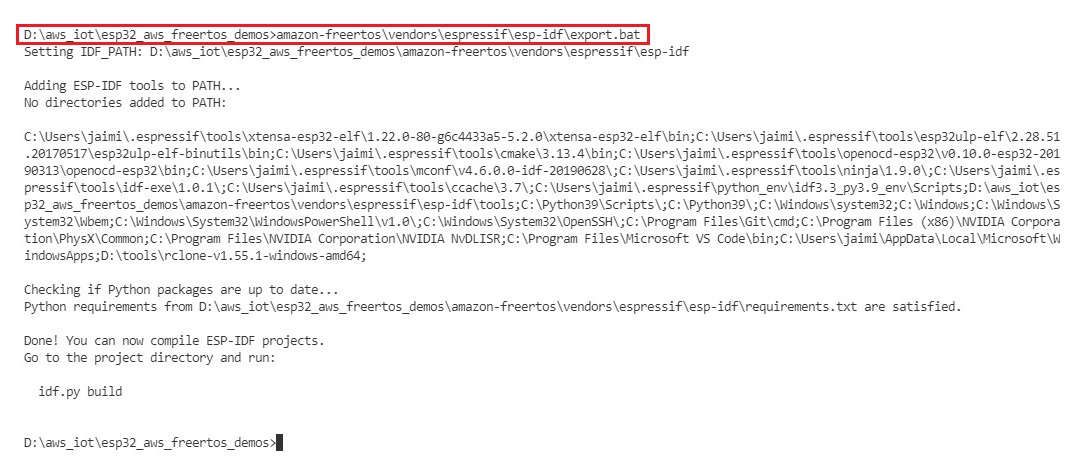
Initialize esp-idf tools:
- Open the command prompt and change the working directory to the root directory of the repository.
cd esp32_aws_freertos_demos - Setup esp-idf tools
amazon-freertos\vendors\espressif\esp-idf\export.bat
Build the project
The claim certificate is included in the firmware binary, on boot if the certificate doesn’t exist then this claim certificate is written to the non-volatile storage for subsequent usage. Hence, it’s recommended to erase the flash before flashing the binary.
Erase the flash:
idf.py -p <SERIAL_PORT> erase_flash
Build and flash the binary:
- Generate build files
cmake -S . -B build -DCMAKE_TOOLCHAIN_FILE="./amazon-freertos/tools/cmake/toolchains/xtensa-esp32.cmake" -GNinja - Build the project
cmake --build build - Flash the firmware
idf.py -p <SERIAL_PORT> flash
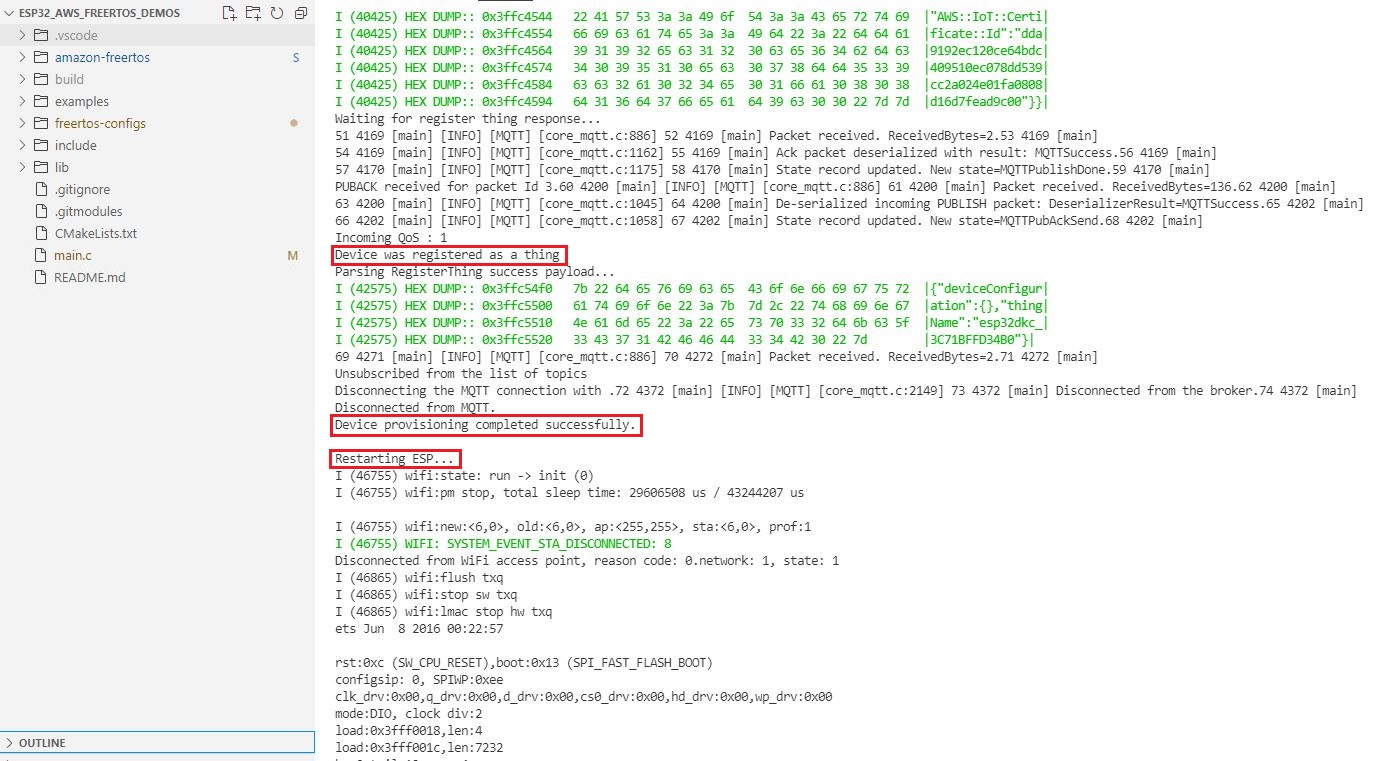
The device connects to AWS IoT using a claim certificate, then requests AWS IoT for a new certificate. On receiving the new certificate, the device replaces the claim certificate with the new one. Then disconnects and restarts itself.
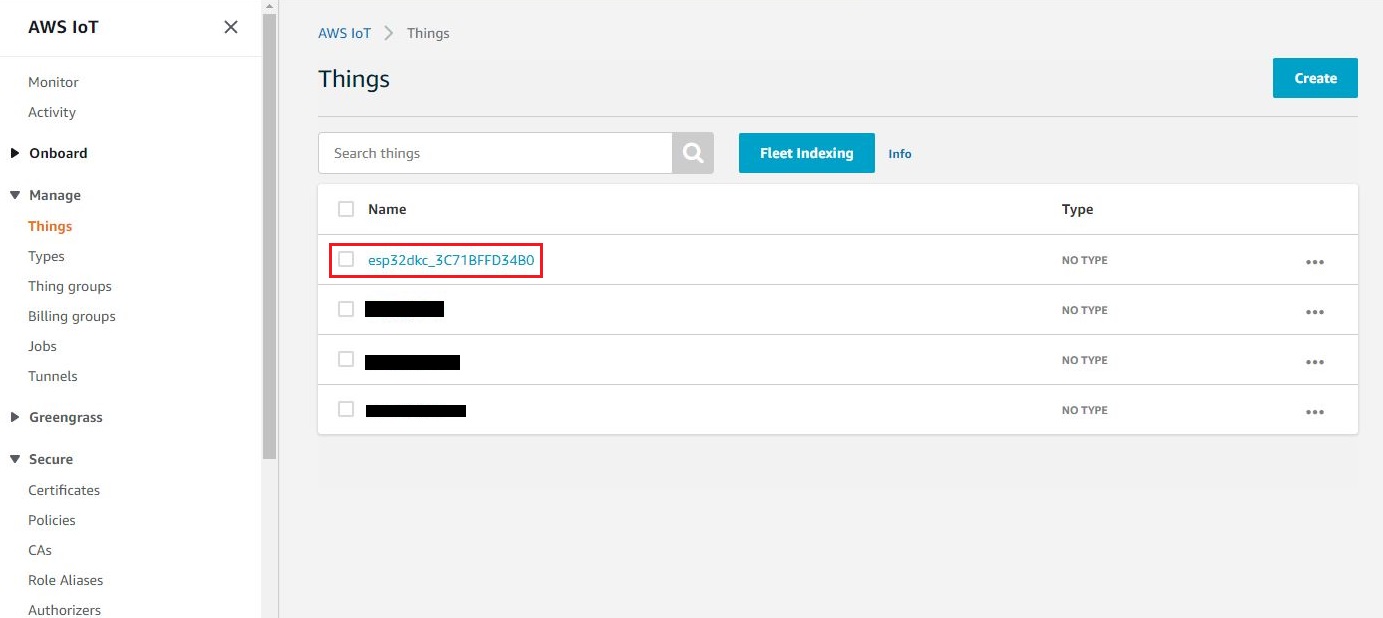
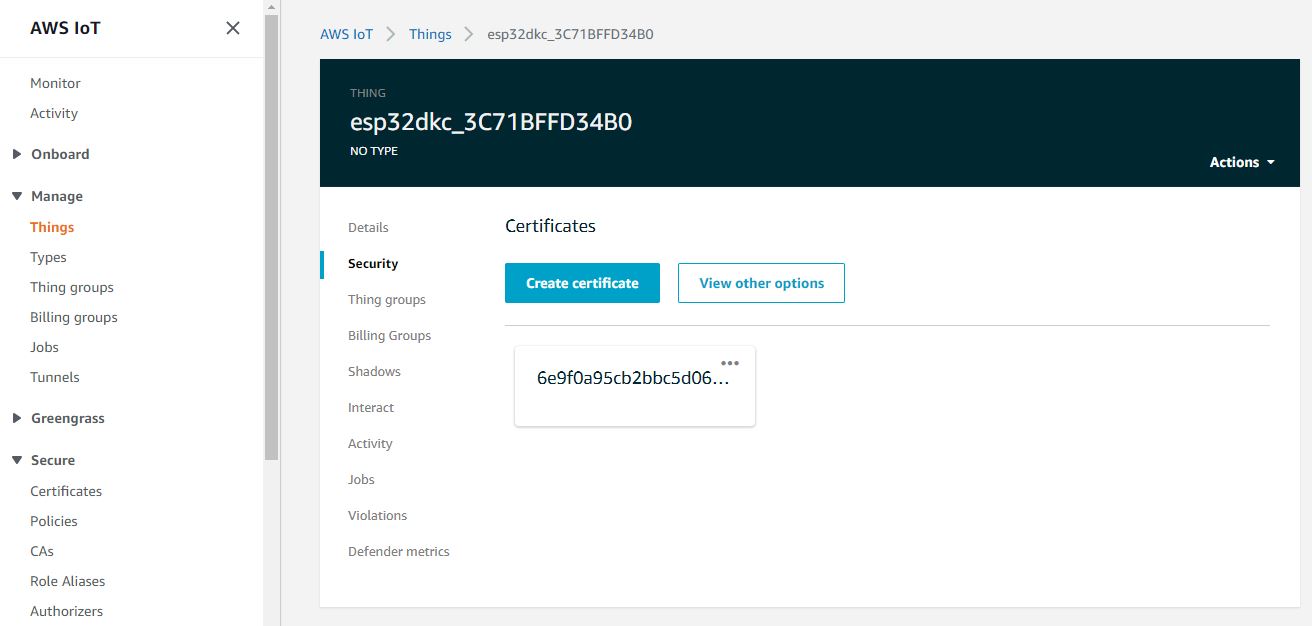
Verify that the device is visible on the AWS IoT console as a thing. Click on the device, switch to the Security section from the left navigation pane. You can see the associated certificate on the AWS console. You can now manage this device from the AWS console.
After the device has restarted, you should see the device certificate is provisioned message on the serial terminal. Next, you could run the MQTT publish-subscribe example and test the device.
MQTT Publish & Subscribe
In this example, after connecting to AWS IoT broker the device subscribes to a topic then it publishes a hello message every 5 seconds. After publishing 3 messages the device waits for some time, then it unsubscribes and disconnects from the broker.
The example uses the device name in the topic name to generate two topics. Use the AWS IoT dashboard to check your device name. The device logs the topic names on the serial terminal for your reference.
- Subscribe topic:
example/<device_name>/to_device - Publish topic:
example/<device_name>/from_device
As we have already configured WiFi and AWS configuration in the previous example we skip the configuration steps and jump directly to the build step (step #3).
Build
Copy the source file
Copy the main.c file from the example folder to the root directory.
Initialize esp-idf tools
amazon-freertos\vendors\espressif\esp-idf\export.bat
Build the project
Perform a clean build by deleting the build folder, then run the build commands.
rmdir /s /q buildcmake -S . -B build -DCMAKE_TOOLCHAIN_FILE="./amazon-freertos/tools/cmake/toolchains/xtensa-esp32.cmake" -GNinjacmake --build buildFlash the firmware
Do not erase the flash. Otherwise, the installed certificate would be erased and the device would not be able to connect to AWS IoT.
idf.py -p <SERIAL_PORT> flashTest with MQTT Client
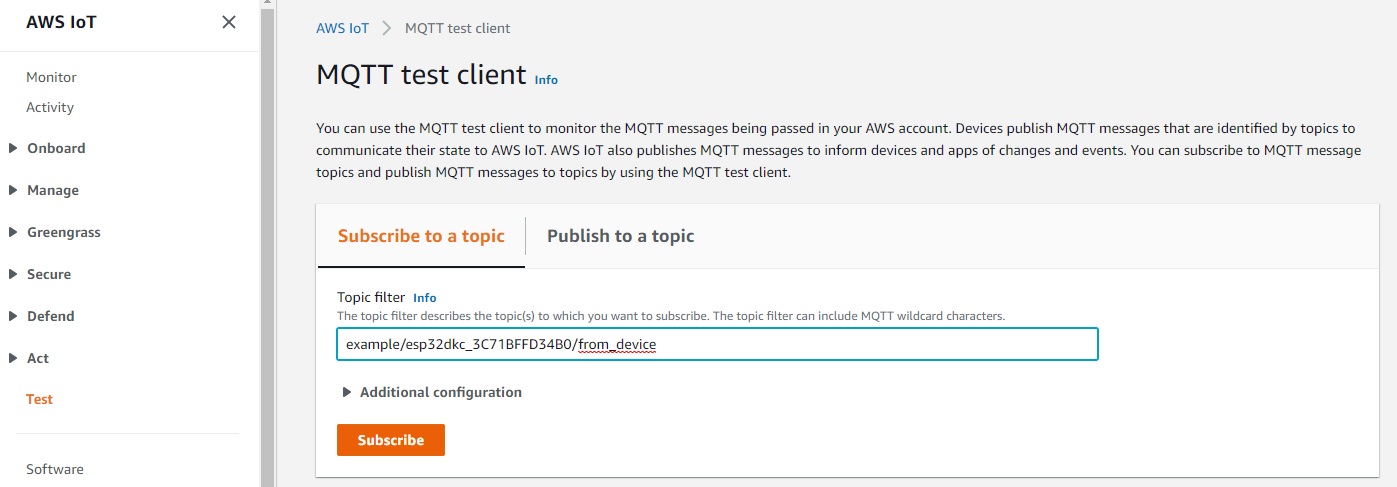
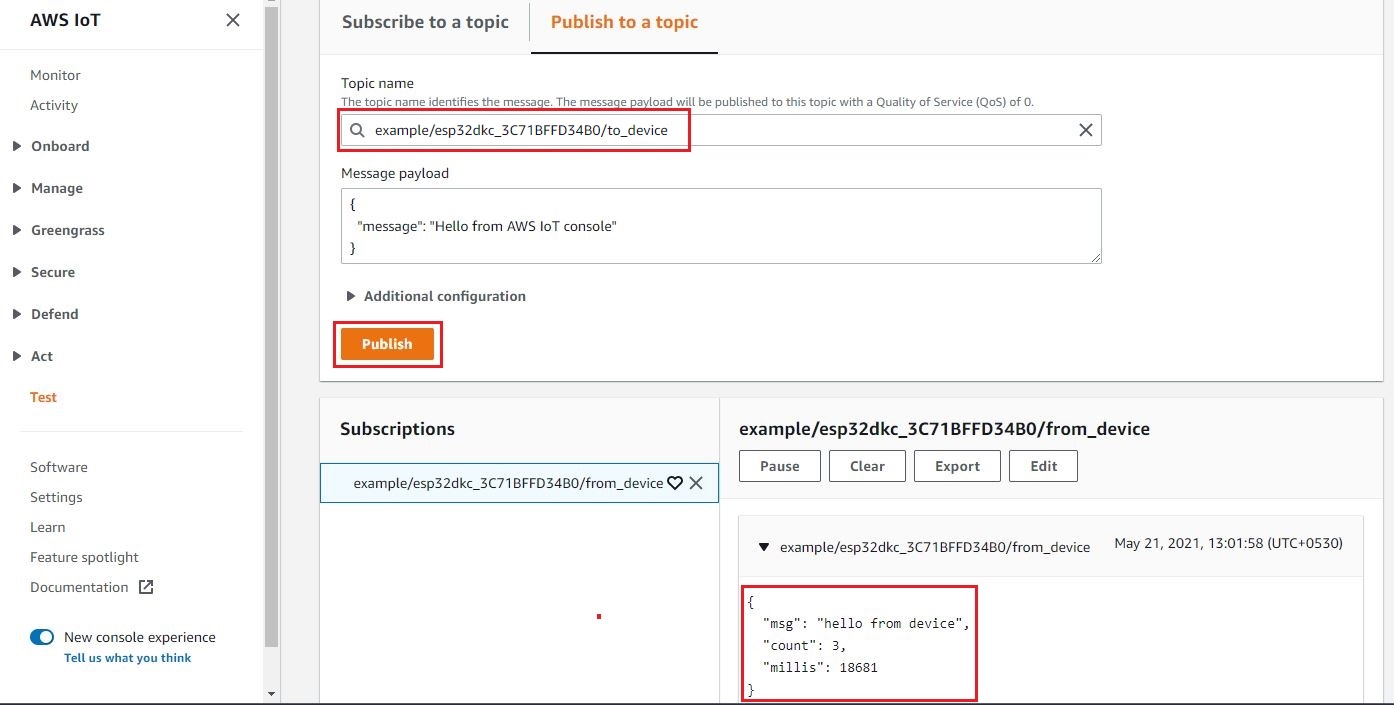
After flashing the firmware the device logs the topics on the serial terminal. Use the topic names to test with your client. You could also use the AWS test client from the AWS IoT dashboard to quickly test the example.
Find the topic name from the serial terminal
Subscribe
Subscribe to the topic to receive messages from the device.
Publish
Publish a message from the test client. From the screenshot below, you can see messages from the device are received by the test client.
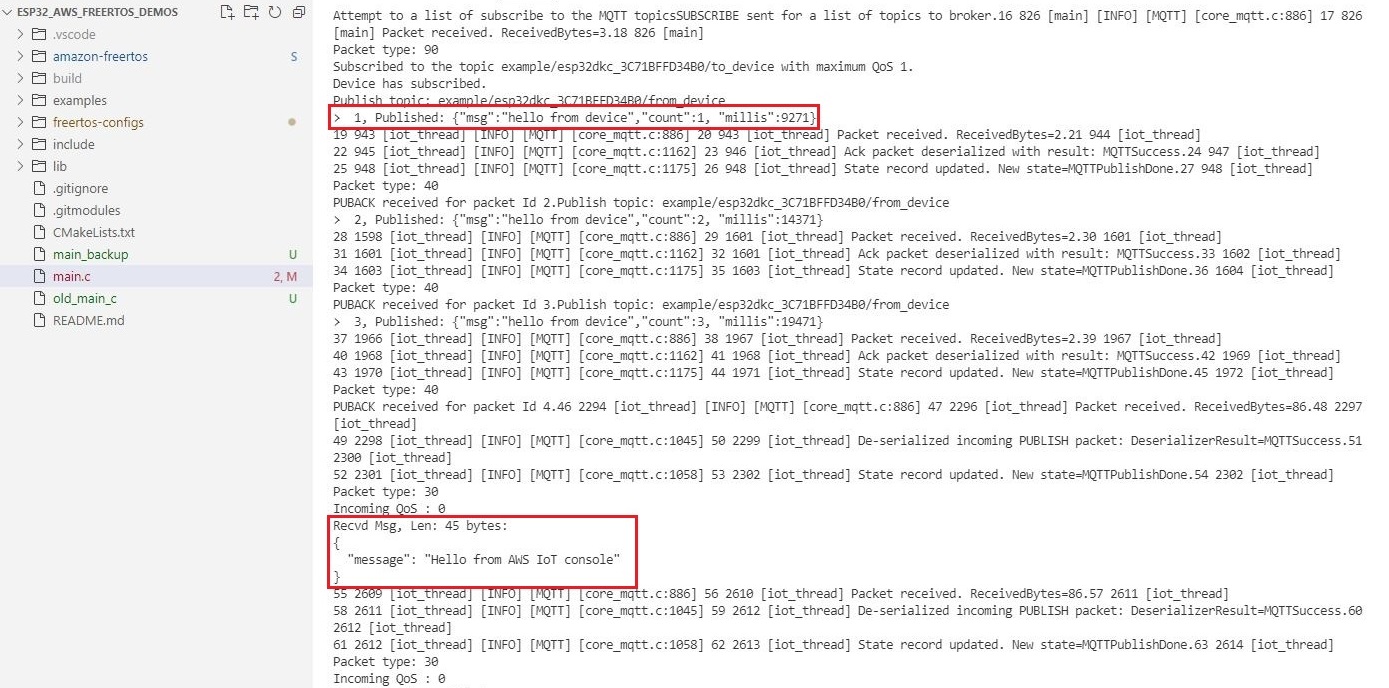
Device Logs
On the serial terminal, you can see that the device has received the message that was sent by the test client.
The free usage of library is limited to 1 hour. It is meant for testing and demonstration only. If you need access to the source code of the library or if you’re looking for a customized solution, reach out at hello@buildstorm.com
Setting up KAA IoT for device connection
Overview KAA IoT device setup involves the creation of application and device on the cloud platform, enabling seamless communication and interaction between the cloud and the registered device. Creating a device profile enables us to obtain the necessary...

