
Device provisioning is the process of registering and configuring devices onto an IoT platform or network to enable them to securely communicate and interact with the cloud or other connected devices. This involves assigning unique identifiers, credentials, and settings to each device, ensuring they can authenticate themselves and establish secure connections. This approach streamlines the device onboarding process for manufacturers and developers while maintaining robust security measures.
ThingsBoard offers different methods for device provisioning, for now we will focus on MQTT-based provisioning, utilizing the provisioning device secret and key. lets explore this method further and examine the steps required to set it up in the cloud environment
Create Device Profile: First, we need to define a device profile within ThingsBoard. This involves specifying the type of device, transport protocol(MQTT,HTTP etc), and other relevant information to generate a provision key and provision secret. These unique keys, alongside the device profile, serve as a standardized template for devices belonging to the same category.
Register Device: Using the device profile and generated credentials, the device is registered onto the ThingsBoard platform. This registration process establishes the device’s identity within the system and generates a unique access token or API key that the device will use to authenticate itself with the ThingsBoard platform.
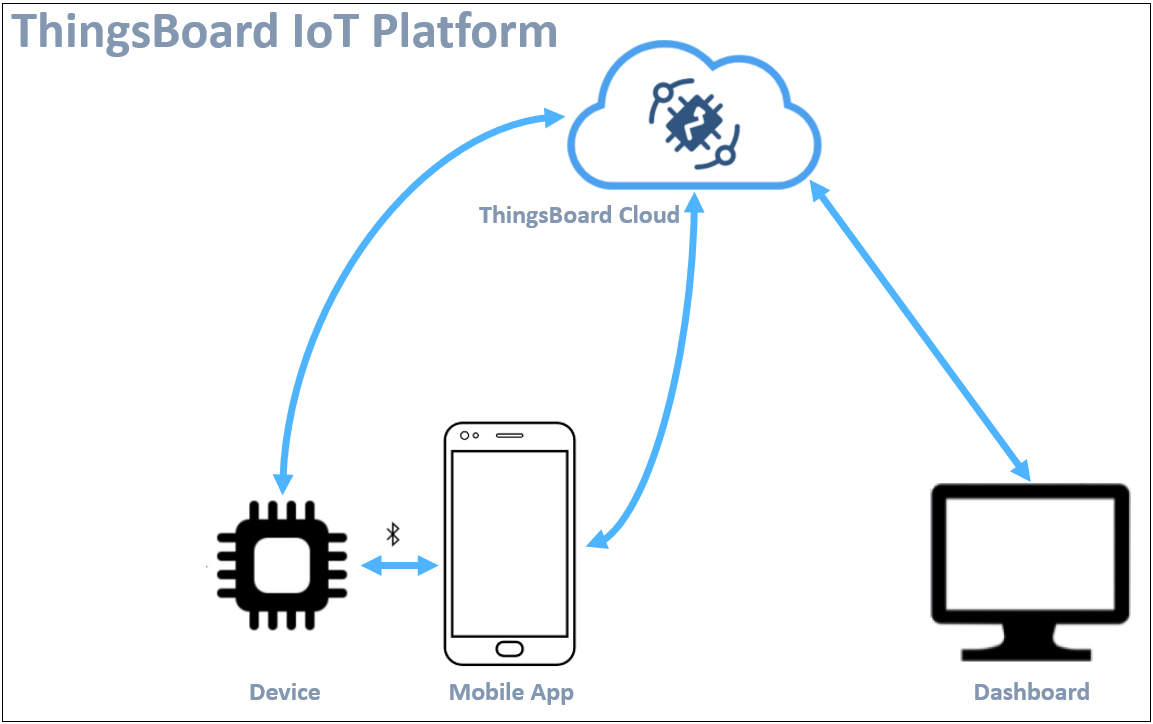
Connect Device to Cloud: Once provisioned, the device establishes a connection with the ThingsBoard cloud platform using the unique access token. This connection allows the device to send telemetry data, receive commands, and interact with other services hosted on the cloud.
In the following section, we will explore how to create a device profile and generate the provision service key and provision device secret. These keys are crucial when using Buildstorm’s Thingsboard IoT platform to register devices on the cloud.
ThingsBoard Device Profile Setup
Sign in to the ThingsBoard Console, open the ThingsBoard Cloud
Device Profile Details:
- In the left navigation panel, choose Profiles, and click on Device Profile.
- Click on ‘+’ to add device profile.
- Provide a unique device profile name and click on Next: Transport Configuration

Transport Configuration:
- Choose MQTT as the transport type.
- Keep the topic filters unchanged.
- Set the MQTT device payload to MQTT. Click on “Next: Alarm Rule“

Alarms:
- Add any necessary rules, or proceed directly to Device Provisioning by clicking the next step.
Device Provisioning:
- Choose “Allow to create new devices” as the provision strategy.
- Copy and save the Provision Device Key and Provision Device Secret.
- Click on “Add” to complete the setup.

Default Device Profile:
- Make this profile as the default option for provisioning devices. Also making it the default, it will automatically be assigned to new devices if no profile is specified.

Project setup
The next step involves utilizing the Provision Device Secret and Provision Device Key generated in the previous steps within your project for provisioning purposes. These credentials should be configured in the app_config.h file as shown below.
Device Side
Try it out
Try out the provisioning and other ThingsBoard examples such as telemetry, attributes, and OTA (Over-The-Air) updates on our IDF and Arduino-based platforms listed below.
Please take a look at the device provisioning video demonstration.
Check out the comprehensive ThingsBoard demo playlist showcasing telemetry, attributes, OTA updates, and real-time use cases from Buildstorm.
Licensing and Custom Solutions
If you’re looking for a customized solution, reach out at hello@buildstorm.com